
1. Introduction
With the availability of GPU’s on demand in the cloud for a very decent price, and deep learning frameworks getting more and more mature, it is now more than ever easier to experiment with deep learning and create models.
There might be a downside to this, if you don’t manage your experiments and analyses carefully, you could end up with lots of code or notebooks of all your analyses. Dataiku provides a nice environment where you are guided through your deep learning experiments. The software will help your experiments to be organized, managed and shareable. Moreover, their “semi visual deep learning” approach, as they call it, provides the following benefits:
- Preprocessing your data (Handling missing values, categorical data, rescaling, …)
- Handling the training process, including epochs, generators, early stopping
- Showing per-epoch training charts and giving early stopping capabilities
- Integrating with Tensorboard, Building all results metrics and charts
- Giving ability to score, Deploying deep learning models to API nodes for production deployments
In short, with Dataiku you can re-use code an models as much as possible so that you as a data scientist can focus on the analysis or experiment.
Hardware and software
There is a free edition of Dataiku that contains the semi visual deep learning. It is easy to install it, you’ll find more info here. To speed up deep learning computations I installed Dataiku on a deep learning VM with a GPU on the Google Cloud platform. This is handy, all the drivers and third party dependencies are installed and pre-configured for you.
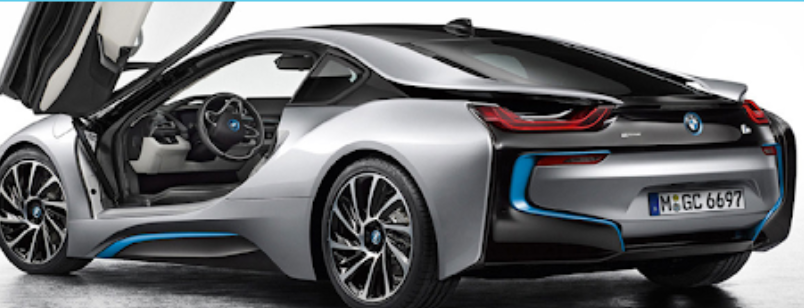
2. BMW and Peugeot’s
The data I have used for this little exercise are 350 images of cars. Specifically, I have images of BMW’s and Peugeot’s divided evenly. It is not a big collection of images. The question is, can we build a car classifier on this data set?
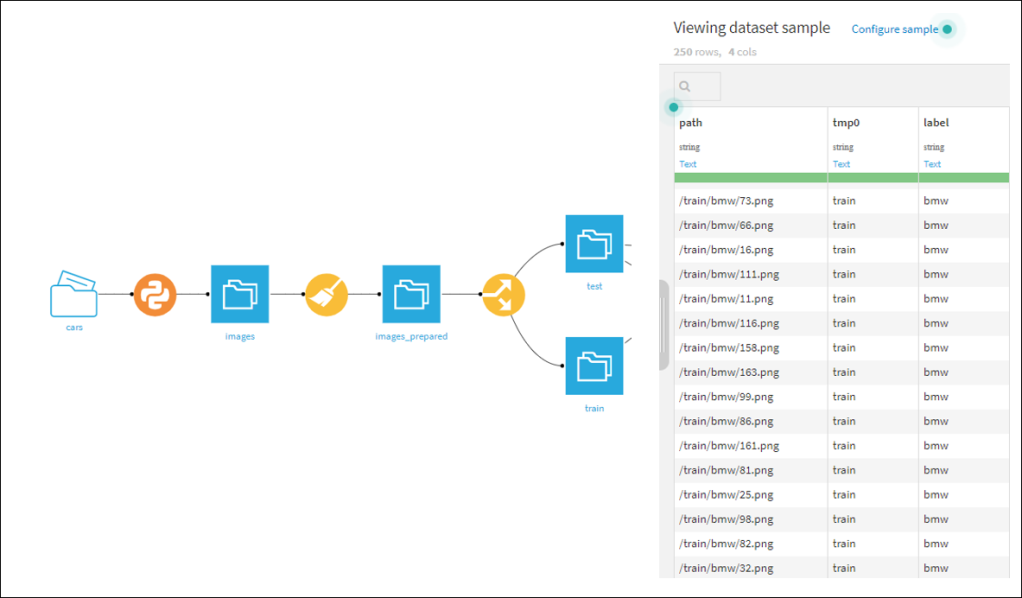
We start with an empty project in Dataiku, from this project you can define a folder to upload the images that you need. There should be a train and test sub folder and in those folders you need sub folders for each class. So a BMW and Peugeot sub folder in my case.

From this folder a few steps are needed to create a test and train data set. In these sets we have the path and label of each image in the folder.
3. Some deep learning experiments
We now have the data set in a suitable format and the underlying images in a Dataiku folder. There are several approaches you could under take in building a car classifier. I tried the following
- Build small CNN’s from scratch,
- Use pre trained networks for transfer learning.
We start an analysis by selecting the ‘Lab’ environment and then specify the type of analysis,
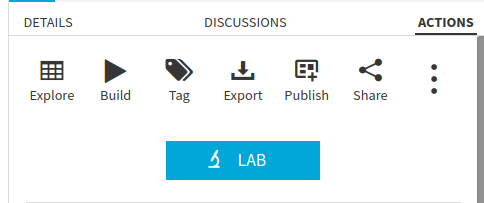
in my case a prediction task where you need to specify the label column and the ‘Deep Learning’ mode.
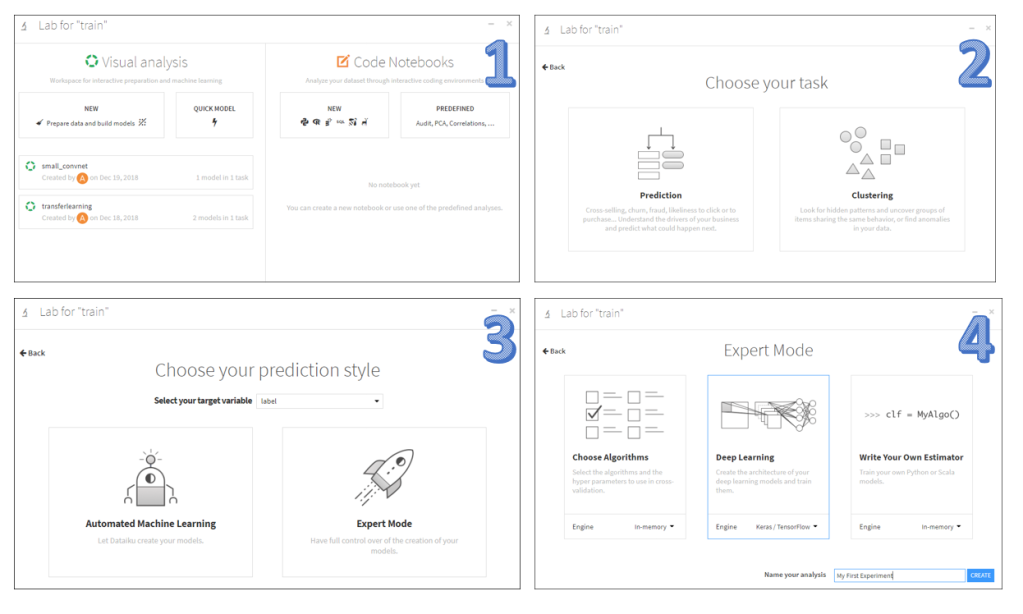
Dataiku will launch a ‘Design’ interface of the analysis where you can set different options: the metrics to use, shuffling, batch sizes, number of epochs. The most import setting is the architecture of the network. The deep learning frame work is based on keras / tensorflow. So the thing you need to do as an end user is to specify the neural network layers with ‘keras syntax in a Python function. By default a simple model is already inserted: a one dense layer network architecture.
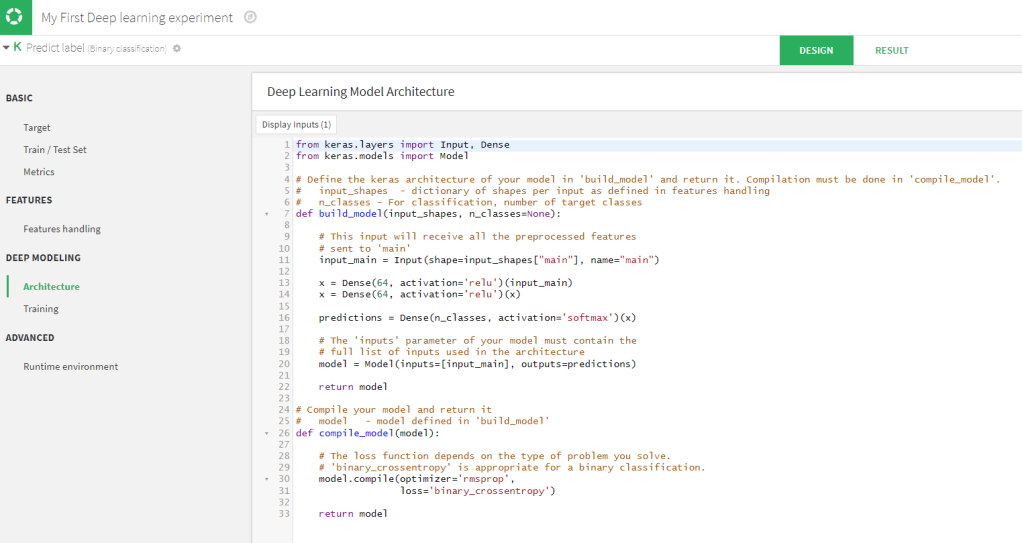
This model will be too simple for image classifications, fortunately there are some other prebuild network architectures that you can re-use. Moreover, you can add your own architectures to the list, so that it will become easy to use those. as well.
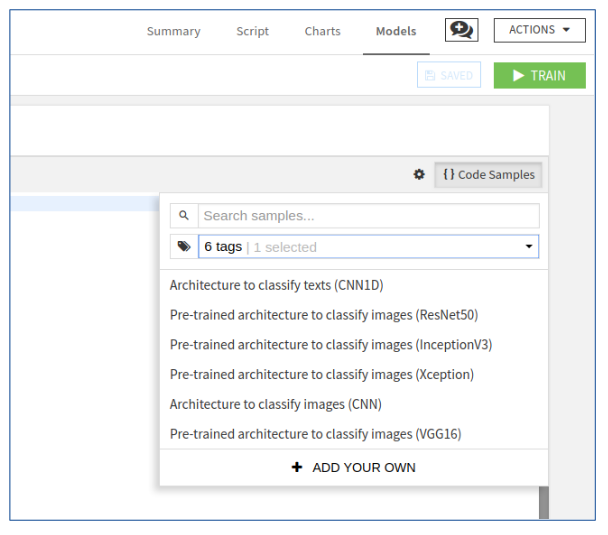
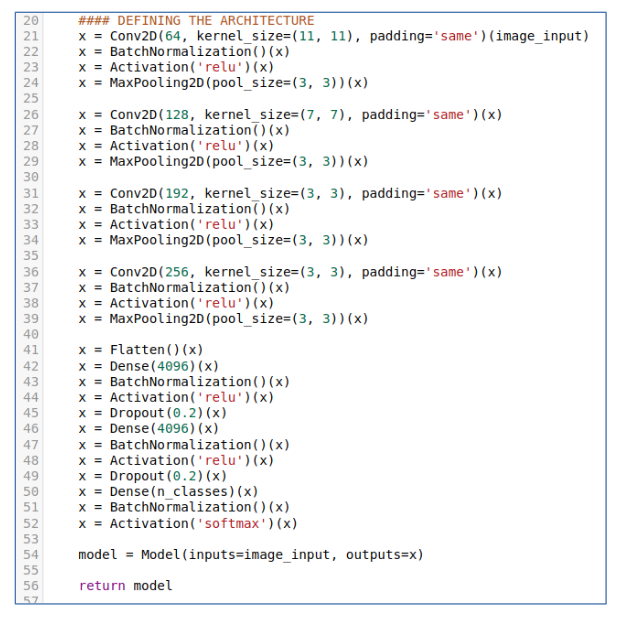
We can for example select ‘Architecture to classify images (CNN)’ that is already there, then we get the following code:
If you are happy with the model and the rest of the settings you can start training. Since I installed Dataiku on a machine with a GPU, it can make use of it.
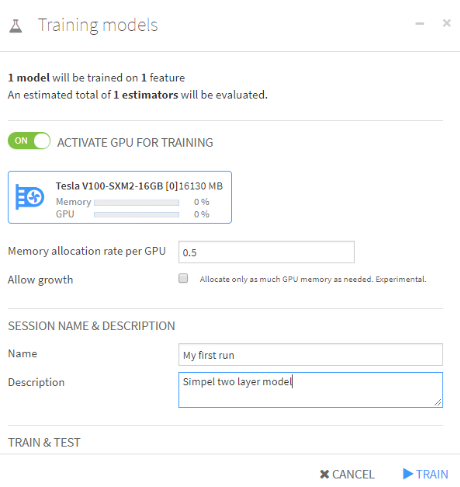
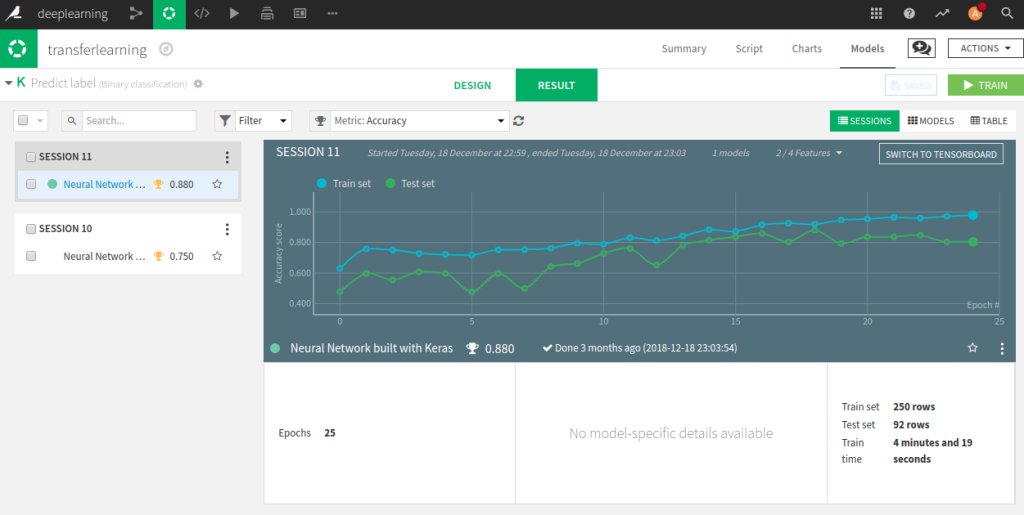
You can give a name to this specific session, that might be handy when you have different runs. Even with a GPU, it can take some time to finish. During the training Dataiku will keep track of the training metrics on each epoch in a graph, as the graph below show. The whole process runs on the background, so you can do other things in the system, like setting up another deep learning analysis if you want to.
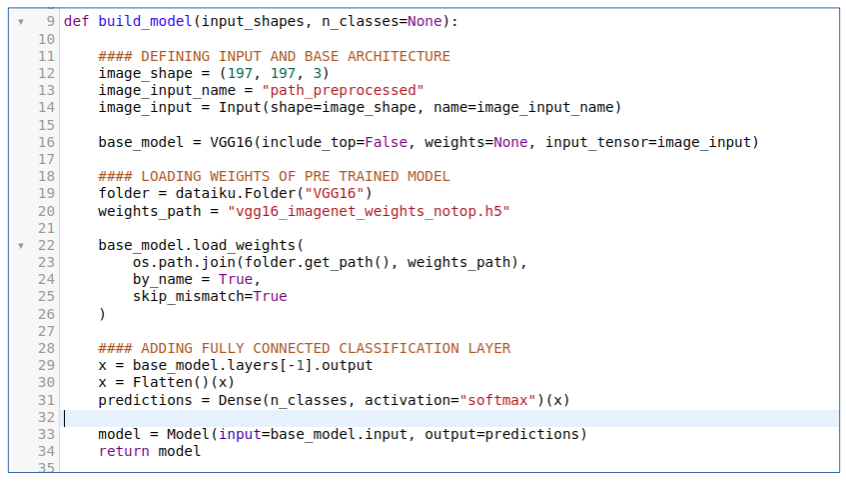
Another experiment we can setup is building an image classifier by using transfer learning. In the code samples we can select ‘pre trained architecture to classify images’. Then the following code, as displayed in the figure below, will appear. It is much shorter it loads the pre-trained VGG16 network with out the top layer, we will replace that by a fully connected layer.
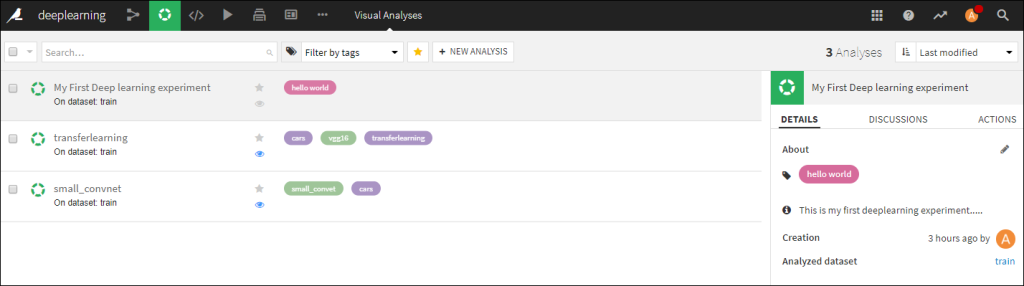
It is not that difficult to setup more and more experiments/analyses with different network architectures. To manage all those experiments Dataiku provides an interface where you can tag and name your different analysis and give them short descriptions. The results of all your analysis are stored as well, i.e. training settings, training metrics and tensor boards. The figure below shows three analysis that I have created.
4. Conclusion
With so little images a small convolutional network trained from scratch is not working well here, using transfer learning with a pre-trained model works reasonably well. Semi visual deep learning in Dataiku provides a nice environment to create, manage, share and keep track of many deep learning experiments. That’s it for now, stay tuned for more Dataiku news from me. Cheers, Longhow
